Sunday, March 24, 2013

Tips on EPP, Basting Triangles


Happy Sunday, today I will attempt to show you how I do my EPP basting on shapes with points. In this case a 1" triangle.   I use a dot of Roxanne's Glue baste to hold the fabric to the shape.   If I have the space on my fabric I try to leave a bit bigger seam allowance because it it hard to get the thin ones turned over the edge of the paper.   I trim them a bit later once they are stitched down.


In this photo you can see I gave the seam allowances a quick press.  This does help if you have the time.  I like to sit at the table and get my pieces glued to the fabric and then take to the TV to stitch, so I give a quick press before I go.  Today I am going to soak us some sun and stitch!
I do a loop around the needle and this makes a small know at the eye and then my thread stays in the needle.  I used to just leave it dangling but I was forever unthreading and having to start over.  I use a very fine needle when sewing the pieces together  and have a hard time getting it threaded to begin with.  I do use a threader too!  This is a thick needle that I use to baste so I can get it through the paper.  I just started using bottom line thread for sewing the pieces together and it is fabulous.  Strong, thin and hardly shows!!  I only have 1 spool but will be getting more....


So I like to sew right onto the paper piece and I take lots stitches.  Unlike a hexagon I can't get these tightly sewn unless I sew all the way up to the corners.  And it's usually not pretty.  Will I be picking out the basting for a long time? Probably but my corners look darn good!  On the first stitch I start a little way away from the corner so I can flip the tail the right way, you will see this in a later step.


So keep going around and make as many stitches as you need to so it is tight on the paper.
I'm almost to the last side, it goes pretty quick.


Right here you need to flip the tail so they all go like a pinwheel, the same direction.

I use my needle to slide the fabric under and use the point of the needle to kind of pull the fabric tight then poke it right into the fabric/paper piece.  This gets a nice tight corner.


Ta Da, All done.  The tails all go the same way and I usually trim them up a little, you can see the top and left look ok but the right is too big and a jagged shape.


All trimmed up.....

One example of a finished 2 inch hexagon.  Next time I will show you how to get all those points to line up before you stitch it all together....


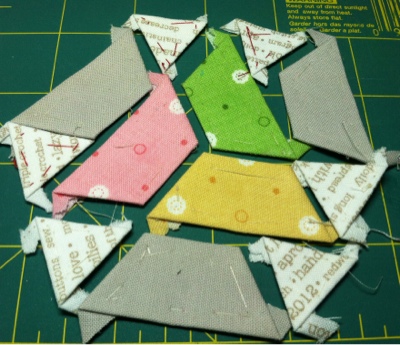
I did this one last night and I think I like it the best so far....You can check out my Flickr set to see the rest of the bunch.......and here is the next set, I have my paper all ready, now I need to pick the fabrics and sew, sew, sew....Happy Sunday, K


Friday, March 8, 2013

Finally a Friday

No finishes here but lots of works in progress. Still working on my pieced hexies and Underground Railroad mini blocks. Long week at work, got to go help open a new store. It's so pretty and perfect. This week is the Pomona sewing and craft convention, gonna go for a quick walk they to see if there is anything good there.


Wednesday, February 27, 2013

WIP Feb week 4

Still working on my pieced Hexie blocks....I ordered more paper pieces from paper pieces .com and I found a great Flickr group and website...hillbilly handiworks. To here to check it out....


Wednesday, February 20, 2013

WIP Wednesday


       Vacation is over and that means less time to quilt....  I am sooo tired I've got to go to bed now...but I wanted to check in with WIP Wednesday over at Freshly Pieced.    I'm still working on my Hexie EPP, trying to gather some hard to find pieces from the collection of Riley  Blake fabrics that  I have chosen and I'm really happy with my online store finds.  Here are the shops and I will tell you they ALL ship really fast.....44. St fabrics,  Crazy quilt girl fabrics,  Fashionable fabrics and. Limasews.com.   Ok off to bed now, jest a few more days until Saturday sewing day!!!   Have a great week! K

Saturday, February 16, 2013

A Finish, Flirt Hexie Bag


     Yeah it's all done, my hand pieced Hexie bag made with a Flirt charm pack.  This is my first of many hexagon projects done with EPP.  I say many because I love this process and I joined a Flickr Sewing Bee group, Get Your Hex On.  I am really looking forward to seeing what each month brings from around the world!  There is a third group starting so if your interested go here.

Happy Hexing, Kristin

Linking up with Plum and June.

Friday, February 15, 2013

Friday Fun Day

          It's been a busy week around here!  I have been cutting up bits of paper, coloring bits of paper and more cutting of bits of fabric....  This is what I've been up to.  Trying to figure out my blocks for the "Get Your Hex On" Bee Quilt.


  My inspiration is the fabulous quilt by  Broderie   called "Candied hexagons",  I Love, Love, Love this look.  Check out her blog, her work is AMAZING!!!


          I am using fabrics designed by Lori Holt for Riley Blake called Polk A Dot Stitches.   Sew cute!    I picked it up on line from Crazy Quilt Girl Fabrics. Great service and same day shipping, Wow!

          In my first attempt I cut out pieces from freezer paper that I had run through the printer.  As it turned out some of the pieces were off by a millimeter which made the corners not match up in the end.  Lots of ripping of those teeny hand stitches which is really quite a bummer, but I got it together in the end.

           Had to remake a few pieces.  I love how the first block turned out.  I probably should have started with an easy one first.  : )
These are about 3 inches wide.   
Each triangle is 1 inch.....


What do you think??  Still looking for more hexagon ideas!

Happy sewing, K

Monday, February 11, 2013

Great Tip


This is my Hexie pile up, in the progress off getting them sew together and quilted!  

While doing a bit of browsing I came across this great tip.  GREAT TIP.

As a blog follower I love to write a quick note to show appreciation of other's quilts and projects, however, after I have got my text in, spelled correctly( most of the time : )), I get the word verification box.  Most the time I can not see it well enough to get it right and can't leave the message.  VERY frustrating!  Then I realized I had it too!  It was an auto function on blogger.  So I promptly turned it off and I NEVER get spam mail.    Any one else have this problem?  If so there is a great tip with step by step instructions to turn it off.

Happy Blogging, K

Thursday, February 7, 2013

Zentangle Heart

Still under the needle. Design from my new book, you can see the heart design on the cover. I am using a signature variegated thread and have had to travel stitch over several times to build up color. It is a really good way to practice my FMQ skills. The fabric is canvas as I wanted a rough texture as the background. Once done I might add some beading or maybe bleed some textile ink into some of the sections to add interest. It's still kinda plain looking right now.

Would love some ideas??


Sunday, February 3, 2013

Sunday Project

          Beautiful day in sunny California!!! I spent a nice hour in the sun doing my first Zentangle. I picked up 2 books at the Road to Ca Quilt show and had some time to try it out.

           Here is a pick of my first attempt. I am using a little spiral note pad with kinda think paper but you are really supposed to use 3.5" square tiles, a thick high quality paper with a velum like finish.


The second book is for sewing Zentangles on fabric, which I thought would be really a great way to practice FMQ and end up with a cool project. The book has some great canvas bags and with the black thread it really looks quite nice.

Gonna go play with some thread......Happy Sewing, K

Update- I spent the day sewing the heart on the cover of the book, it's still under the needle!!! I will show it off later this week......