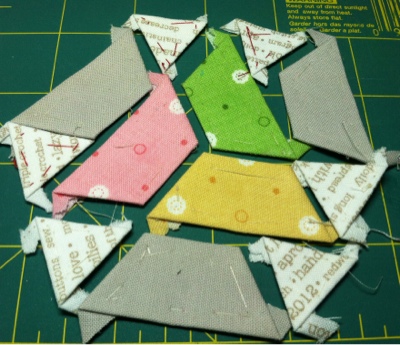
Happy Sunday, today I will attempt to show you how I do my EPP basting on shapes with points. In this case a 1" triangle. I use a dot of Roxanne's Glue baste to hold the fabric to the shape. If I have the space on my fabric I try to leave a bit bigger seam allowance because it it hard to get the thin ones turned over the edge of the paper. I trim them a bit later once they are stitched down.
In this photo you can see I gave the seam allowances a quick press. This does help if you have the time. I like to sit at the table and get my pieces glued to the fabric and then take to the TV to stitch, so I give a quick press before I go. Today I am going to soak us some sun and stitch!
I do a loop around the needle and this makes a small know at the eye and then my thread stays in the needle. I used to just leave it dangling but I was forever unthreading and having to start over. I use a very fine needle when sewing the pieces together and have a hard time getting it threaded to begin with. I do use a threader too! This is a thick needle that I use to baste so I can get it through the paper. I just started using bottom line thread for sewing the pieces together and it is fabulous. Strong, thin and hardly shows!! I only have 1 spool but will be getting more....
So I like to sew right onto the paper piece and I take lots stitches. Unlike a hexagon I can't get these tightly sewn unless I sew all the way up to the corners. And it's usually not pretty. Will I be picking out the basting for a long time? Probably but my corners look darn good! On the first stitch I start a little way away from the corner so I can flip the tail the right way, you will see this in a later step.
So keep going around and make as many stitches as you need to so it is tight on the paper.
I'm almost to the last side, it goes pretty quick.
Right here you need to flip the tail so they all go like a pinwheel, the same direction.
I use my needle to slide the fabric under and use the point of the needle to kind of pull the fabric tight then poke it right into the fabric/paper piece. This gets a nice tight corner.
Ta Da, All done. The tails all go the same way and I usually trim them up a little, you can see the top and left look ok but the right is too big and a jagged shape.
All trimmed up.....

I did this one last night and I think I like it the best so far....You can check out my Flickr set to see the rest of the bunch.......and here is the next set, I have my paper all ready, now I need to pick the fabrics and sew, sew, sew....Happy Sunday, K


WOW! I am impressed! This boggles my mind... I am assuming you hand stitch them together too? I love this... Your hexi is sew pretty!
ReplyDeleteOh, I love this design! I'm off to see if I can find you on Flickr!
ReplyDeleteI'm looking for you on Flickr to learn more...love these hexies!
ReplyDeleteAt last, someone to help with triangles, thank you! I haven't found this advice anywhere else and have been getting in a pickle with my triangles, so this is wonderful. I didn't know they needed to be like pinwheels.
ReplyDelete